Sticking Points: The Inside-Out Guide to Window Decal Placement
When personalizing or branding your vehicle, window decals make a simple yet effective tool. However, common questions arise around these stickers – where will stickers make the most impact? Do they belong inside or outside the vehicle? This choice will play a huge role in the overall impact of your window stickers.
Maybe you're looking to add a unique touch to your vehicle or enhance your shop's storefront appeal. In any case, understanding the ins and outs of window sticker placement is key.
In this blog, we’ll examine the benefits of placing your window stickers either inside or outside. We’ll also take you through some simple steps for applying window stickers to ensure your message is displayed and received in the best way possible.
Understanding Window Stickers
Window stickers are used to serve many different purposes, from advertising to personal expression and even legal compliance. Before we zero in on placement, it's important to look at some different functions of window stickers
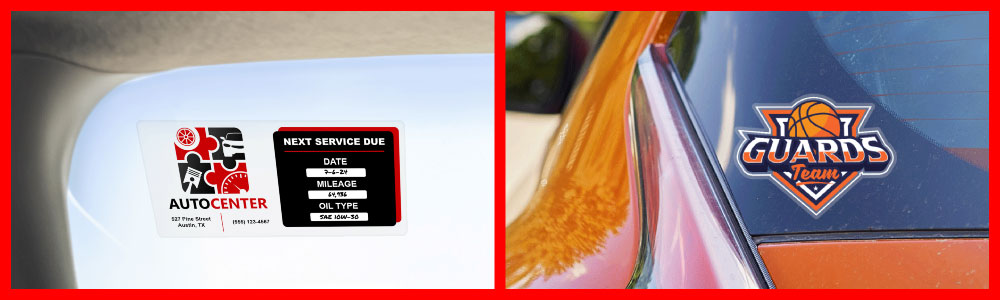
- Decorative: You can use decorative window stickers to enhance the visual appeal of a space. They're also great for personal or brand expression. These stickers are most frequently placed in homes, vehicles, or storefronts.
- Informational: You can use informational window stickers to share key information – like store hours, safety info, or directional guidance – with viewers.
- Branded: You can use branded window stickers to advertise your business, brand, or product to shoppers. These stickers often feature logos or slogans and may be placed in storefronts or on company vehicles.
When placed properly, window stickers offer a litany of benefits. Some of these benefits include seamless information relaying, heightened visibility, and increased brand promotion.
The Placement Debate: Inside vs Outside Window Stickers
So, where is the best place to adhere to your stickers? Generally, we recommend you place stickers on the outside of your vehicle, home, or storefront window. This is for a few reasons:
- Visibility: Most modern cars have tinted windows, making it harder to see stickers placed inside. Even in homes and storefront windows, fog or the glare from the sun may make it more difficult for passersby to see your stickers.
- Durability: High-quality outdoor stickers, like those offered at Decals.com, are designed to withstand weather conditions. At Decals.com, many of our window stickers are produced on high-quality vinyl, making them sturdier and less likely to experience wear and tear from the elements.
- Consistency: Consistency is key, they say. Placing stickers on the outside of your windows ensures all stickers look the same in shop locations and across company fleets regardless of window tinting or other interior differences.
Remember that while there are some big reasons to place stickers on the outside of windows, the stickers used should be designed for exterior application to ensure longevity and performance.
Considerations for Inside Placement
Placing window stickers inside sacrifices some visibility to make sure your message is as safe as possible. With indoor placement, vital information is easier to shield from any external hazards, like extreme weather conditions or vandalism.
Here are a few scenarios where you may want to place window stickers inside rather than outside:
- QR Codes for Promotions: QR code stickers placed on the insides of windows in storefronts make promotions accessible and prevent tampering or weathering that may impact the code’s usability.
- Interior Parking Permits for Vehicles: Interior parking permits are typically placed inside to prevent theft or tampering.
- Operational Hours Stickers for Businesses: Operational hour stickers are typically placed on the interior side of shop or restaurant windows to preserve the visibility of key business details.
How to Apply Window Stickers
Preparation
When adhering a window sticker, there are some steps you can take to create the ideal surface. First, you’ll want to make sure you have the right tools. For preparation, these might include cleaning supplies such as a window cleaning solution, paper towels, and perhaps a credit card or squeegee.
Ensure the window you are adhering to is entirely clean and free of debris before beginning the sticker placement process. Dust, dirt, or oil can prevent the sticker from adhering properly and can cause bubbles.
Application Process
Time to apply. Peel your sticker from its backing and adhere it to your chosen spot. For larger stickers, you may want to consider what's called the "wet application method." All you need to do is mist your glass with soapy water before applying the sticker. This will give you some wiggle room to slide the sticker into the perfect place before the water dries.
To avoid bubbles or wrinkles, consider these tips:
- Apply Slowly and Carefully: Take your time to slowly peel the backing off when you apply car decals or window stickers.
- Use a Squeegee or Credit Card: Once it's placed, you can use a squeegee or credit card to smooth out any unsightly bubbles or wrinkles in your sticker. For the best results, smooth out imperfections from the middle of the sticker to the outer edges.
- Use a Pin for Persistent Bubbles: If you notice any bubbles that are harder for you to remove, try using a pin to prick a tiny hole into each bubble. Smooth over the area afterward for a nice finish.
- Temperature Matters: Avoid applying stickers in extreme temperatures. High heat can make the adhesive too sticky, and cold can make it too rigid. Aim for a mild temperature if possible.
Aftercare & Removal
Once your sticker is applied, make sure to clean around it. Although Decals.com stickers offer impressive longevity, you may find that you wish to switch out your sticker for one with more recent branding or information. For steps on how to remove stickers, check out our sticker removal guide.
Legal Considerations
Visibility and safety are key when it comes to making sure your sticker placement is in line with the law. Different jurisdictions have different regulations for window obstructions. It's important that you familiarize yourself with these laws to avoid any potential legal problems.
- Windshield Visibility: Most (if not all) regions require that the driver’s view through the front windshield remain entirely unobstructed. This means no stickers in the driver’s direct line of sight.
- Window Obstruction: Some states also lay out requirements or restrictions on rear and side windows. These requirements are usually a little more lenient but still exist to promote safe driving.
- Size & Position Restrictions: Some places may only allow stickers of certain dimensions and in specific locations, such as the lower corners of the windshield.
- Tinting & Reflective Materials: Many states have set restrictions on the usage of materials that can distract or obstruct visibility for drivers, such as tint films or reflective stickers.
- Official Permits: Legally mandated permits or disability stickers typically have their own rules regarding how and where they should be displayed.
Whether you choose to place window stickers on the inside or outside of windows ultimately depends on your unique needs. Regardless of your choice, applying stickers the right way will ensure that they look their best and serve a purpose for a long time to come.
Check Out Our Blog
Why Are Decals Important?
Learn how custom decals for commercial vehicles enhance branding, boost marketing reach, and ensure regulatory compliance in today’s competitive market.
Read more...
How to Put a Sticker on Your Car: A Basic Step-by-Step
We'll teach you how to easily install a sticker on your car!
Read more...
Clear Window Decals vs. Window Clings: A Simple Guide
The clear vinyl twins. Similar or different?
Read more...
Go to Blog